So your company uses Office 365, and you are tired of constantly having to go to Microsofts login portal, maybe even decide whether to use your organizational (work or school) account or you personal account before you can log in?
If your company also uses ADFS you can actually skip landing on Microsoft’s login page all together by using what is referred to as smart links. Everyone should set this up, and hopefully everyone has. If you don’t know what a smart link is I can recommend going to this site http://jackstromberg.com/o365-smart-linksso-link-generator/ which will help you generate smart links for various Office 365 services.
Okay so now you have a smart link for e.g. SharePoint online. It should look something like
https://login.microsoftonline.com/login.srf?wa=wsignin1%2E0&rver=6%2E1%2E6206%2E0&wreply=https%3A%2F%2FYOUR-COMPANY.sharepoint.com%2F&whr=YOUR-COMPANY.COM
Where YOUR-COMPANY is replaced with what ever domain your company is using for SharePoint online and the linked Azure AD tenant.
Now you need some redirect service that where you can setup an easy to remember url that can redirect users to SharePoint.
Look no further, today the Azure Function team released support for creating reverse proxies inside an Azure Function. The functionality is meant to be used to bring multiple separate function apps together under a single domain. But it can also be used as a pretty much free redirect service.
To use the proxy feature you first have to enable it, as it is still in preview. You do so under function app settings

Alternatively you can also enable the proxy feature by adding the following application setting to the web app ROUTING_EXTENSION_VERSION set its value to ~0.2
To create a reverse proxy in an Azure Function, all you have to do is to place a proxies.json files in the wwwroot of the function app. Lets say you want to create a smart link proxy for your sharepoint online using the link we generated earlier, then the json would look like
[js]
{
"proxies": {
"sposmartlink":{
"matchCondition": {
"methods":["GET"
],
"route": "/"
},
"backendUri":"https://login.microsoftonline.com/login.srf?wa=wsignin1%2E0&rver=6%2E1%2E6206%2E0&wreply=https%3A%2F%2FYOUR-COMPANY.sharepoint.com%2F&whr=YOUR-COMPANY.COM",
"responseOverrides":
{
"response.status": "301"
}
}
}
}
[/js]
When the proxy is setup with a route like above, the root url of the Azure Function app will do a redirect to the smart link url. Obviously you can also set "route": "/sharepoint" to have the smart link have a different url. The proxies.json files also supports creating many proxies in the same file if you feel like it.
If you don’t want to manually editing the proxies.json file, there is also a UI in the portal that can be used.
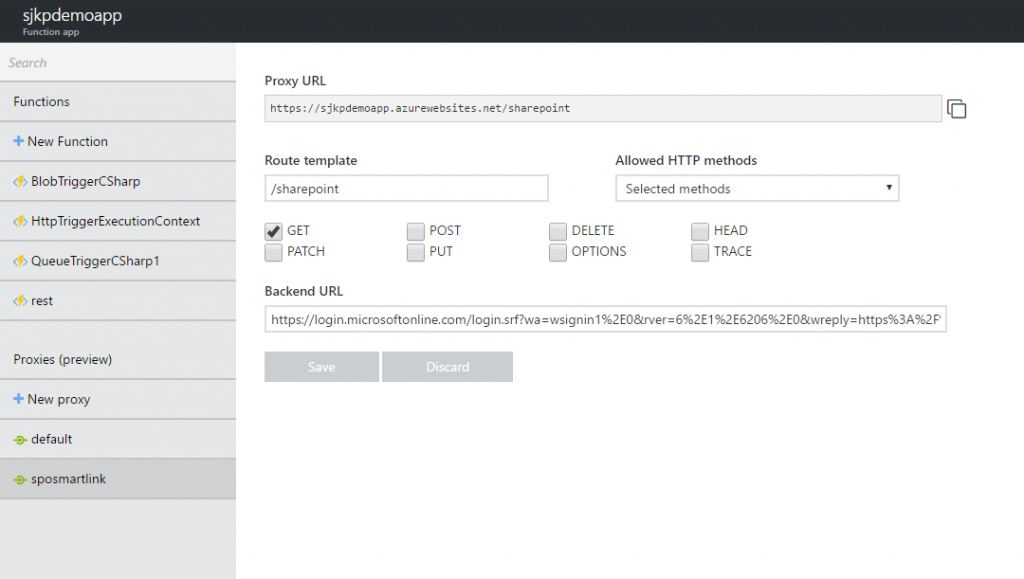
I just wanted to point out that the UI is nothing more than an editor of this JSON file. For more information about what you can do in the json file, take a look at my post Use Azure Function as Proxy