The Office 365 product suite (SharePoint, Exchange, Onedrive and the Office package), is moving in an interesting direction. Instead of being products, it starting to become more of a service platform that you can use for whatever you see fit.
One of the recently released tools, that really makes this evident is the Office 365 API Tools for Visual Studio. What this tools helps you do, is to wire up everything that is needed to start using any of the many Office 365 APIs from your windows phone mobile or MVC app.
I will in this blog article explain how I extended a sample MVC application to pull user data from the Exchange via the odata endpoints. You can decide what you want to do with the data, but it could e.g. be used to show calendar appointments in your app, or create appointments in the user’s calendar.
How to grant 3rd party apps access to the Office 365 OData API
To gain access from a 3rd party app to any of the Office 365 OData APIs a few things need to be setup. Let me just briefly explain the concepts that enables your app to get access to data in Office 365 on behalf of the app users.
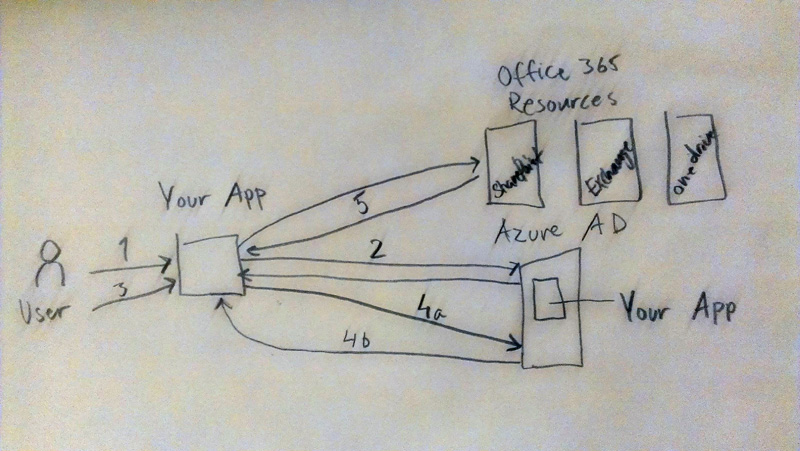
- First the users authenticates with the app, as part of the authentication process, the users is asked whether or not it’s okay for the app to access data in Office 365 (or other resources) on their behalf. The number of resources the app asks for consent for and the type of consent, is defined by the number of resources that the app in Azure AD is configured to be able to consume data from.
- When authorized, and authcode flows back to the app, this authcode can later be used to retrieve an access token for any of the Office 365 resources
- The user might now use the app, without any futher communication with Azure AD, until the point where the users access an area in the app (a Controller) that wants to access a Office 365 resources.
- When a Office 365 resources is being access, it requires an access token, the access token, will enable the resources to determine that we are really who we claim to be, and will enable us to do operations as the users. If the app have no access token, or it is expired, it must request one from Azure AD.
- When the app have an access token, it can access the Office 365 ressource on behalf of the user, e.g. pull data from the users calendar.
This all might sound very complicated but in fact it is really easy with the tooling support Visual Studio has to offer.
Creating the Project
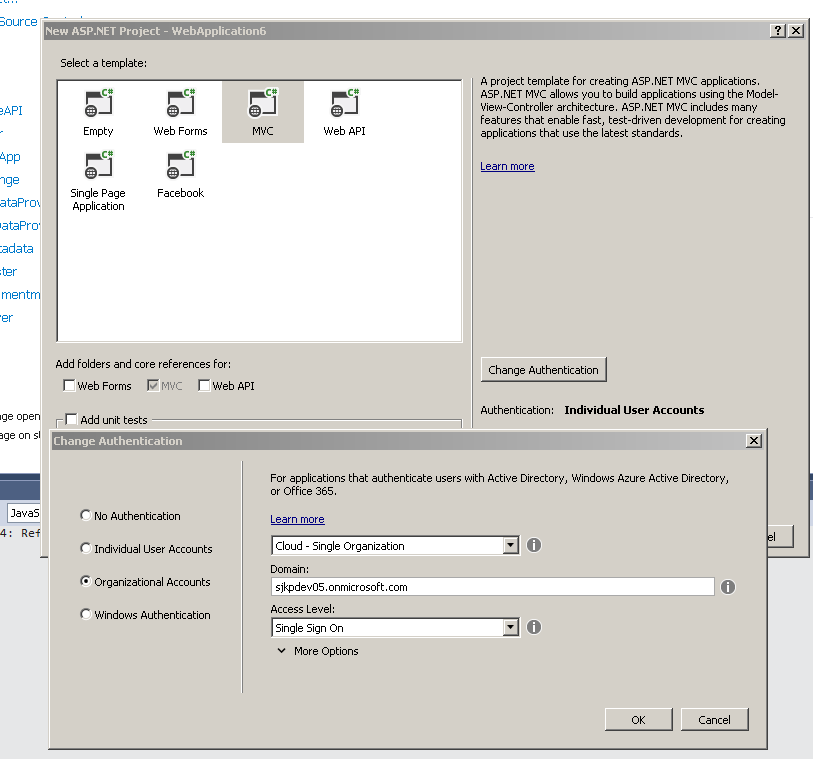
First you need to create a new ASP.NET Web Application – MVC project where you configure the project to use authentication, specifically “Organizational Accounts”. When you select your domain it is important that you use the same domain as your Office 365 subscription was created under (in my case sjkpdev05.onmicrosoft.com), as it will ensure easy connectivity between the app and the Office 365 API.
If you haven’t already connected the Azure Active Directory that you automatically get when you create an Office 365 subscription (trial or not), with a Microsoft Azure account, you should do that now, so you will be able to actually see what Visual Studio does for you in Azure AD when you enable organizational accounts.
If you don’t know how, then follow this guide.
- Sign in to https://portal.microsoftonline.com/ with an admin account (in my case [email protected])
- No you are signed in with Office 365 – then navigate to https://manage.windowsazure.com/sjkpdev05.onmicrosoft.com (where you exchange sjkpdev05.onmicrosoft.com with your domain name)
- From here you will be redirect to this ugly screen, telling you that you have no subscription associated with your account.
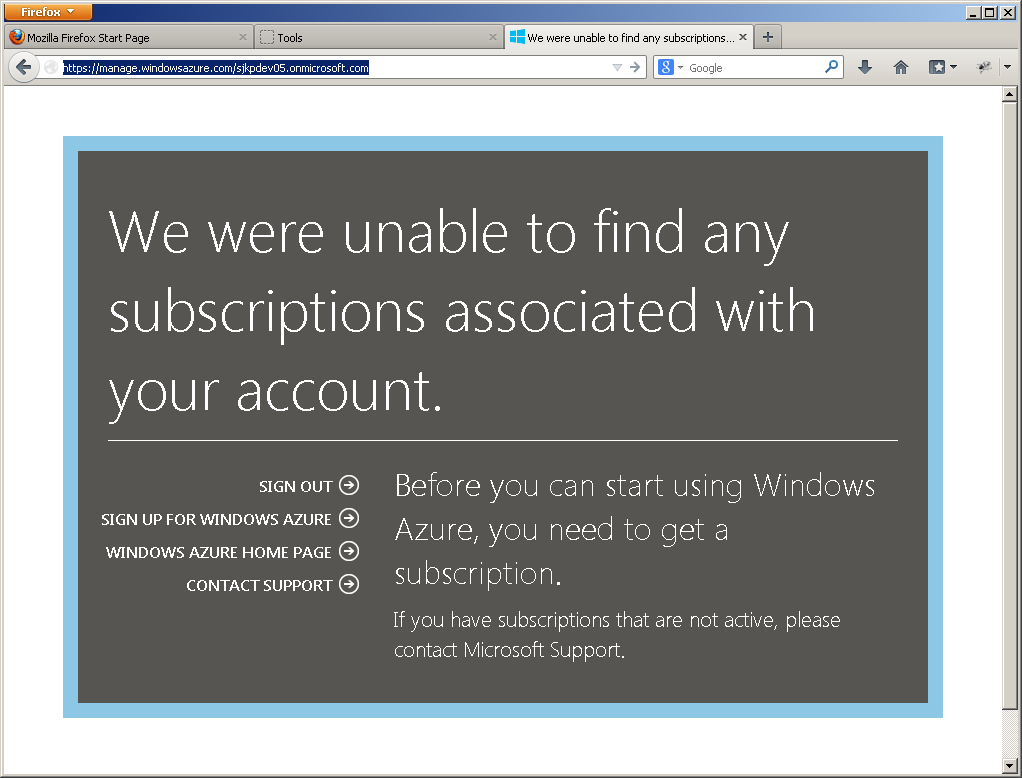
- So we need to press the “sign up for windows azure” to enable our account to be able to log into Microsoft Azure, so we can manage our Azure Active Directory.
- In order to complete the sign up process a valid mobile phone number and credit card is need (you will not be billed for using the Azure Active Directory, as it is a free fix Microsoft gives.)
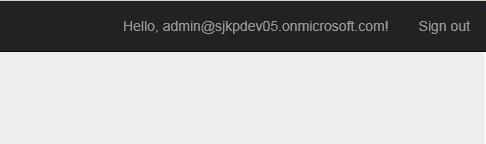
When you create the application it will ask for credentials, if you provide credentials of a user with access to manage the Azure AD, it will automatically create a new app in your Azure AD, and configure everything for you. So once you run the app you will be able to log on using credentials of an Azure AD user. If everything is working as it should, you will, once you log in see your username in the upper right corner.
 .
.
If you look in the Azure portal, under Active Directory, under Applications you will see a new application that was created by Visual Studio, in my case the application have the awesome name “WebApplication6”.

Connecting the app to Office 365 API
Now we are at a stage where we are ready to connect the app to the Office 365 API. If you haven’t already installed the Office 365 API Tools – Preview now it is the time (a Visual Studio reboot is required).
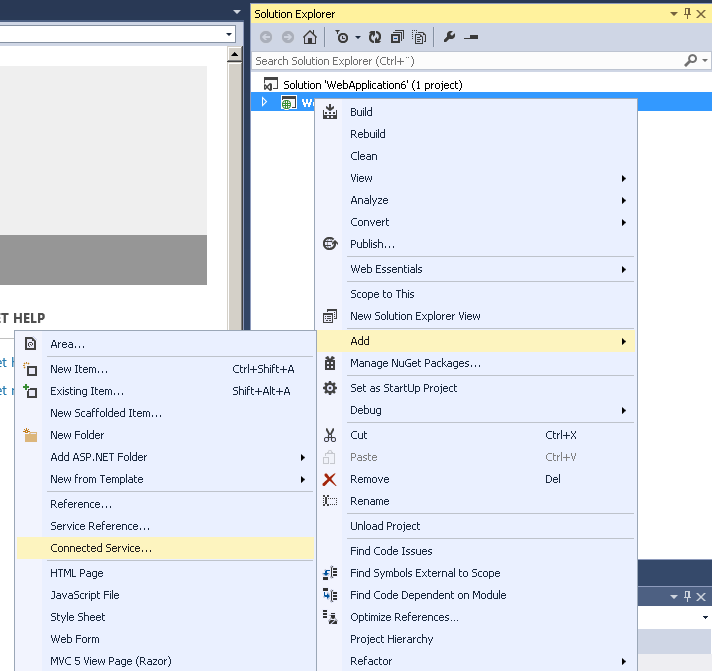
Once you have the Office 365 API Tools installed, a new menu “Connected Services” will appear under Add when you right click your project.
 .
.
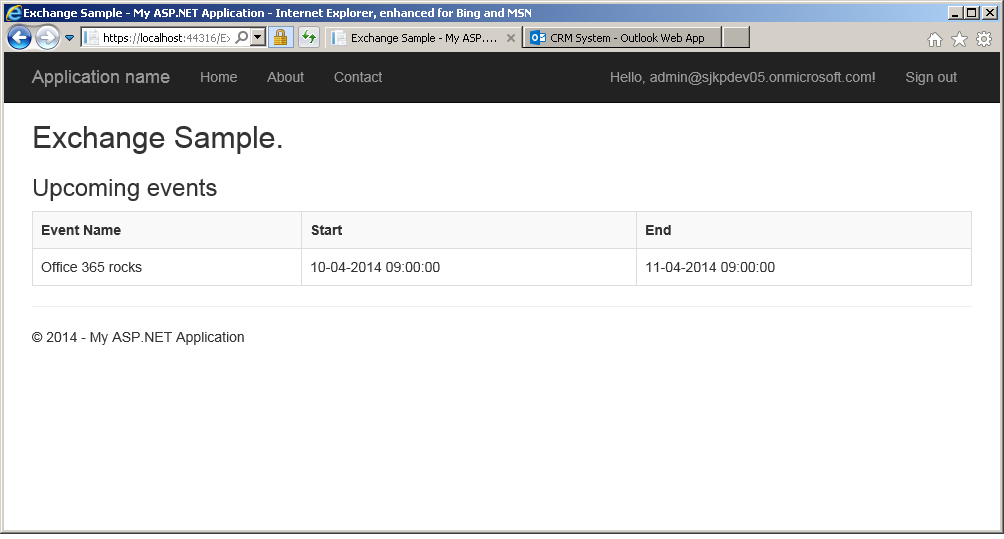
If you click on this, you will see an new dialog where you have to sign-in again. When you do that, you will be able to select which services you want you app to be able to use. In my case I simply selected Exchange and took both calendard permissions, and selected “My tenant only”. The Office 365 API Tools will now generate a ExchangeSample controller+views for you. When running the app you get the following overview of your apointments when browsing “/ExchangeSample/Calendar”
 .
.
This concludes the my introduction to how easy it is to get started using the Office 365 API from 3rd party application. Within the coming weeks I will probably post more on the topic, as I want to dig deeper into it.
A last warning, everything I showed here is in preview, so it might change in the future. In fact I wrote this article, while still having version 1.0 of the Office 365 API Tools installed on Visual Studio 2013 Update 1 even though they just released version 1.1 that is compatible with Visual Studio 2013 Update 2 RC.